
Guide
How to Create a Digital Wedding Invitation in 10 Minutes
Create a professionally designed digital wedding invitation in minutes, collect RSVPs and keep using the same guest list when it is time to organise the seating plan.
A polished invitation without the design overhead
Couples do not need design skills, coding knowledge or hours of setup to publish a guest-ready wedding invitation.
With The Wedy, most of the visual work is already done. You choose a finished design, add the wedding essentials and open the invitation to guests. In around 10 minutes — when the core details are ready — you can have:
- A professionally designed wedding website
- Ceremony and reception details in one place
- Structured RSVP collection
- A mobile-friendly guest experience
- A shareable wedding link ready to send
This guide walks through the practical sequence from design selection to publishing, then shows what happens after guests respond.
Prepare before you start
Ten minutes is realistic for a clear first version when the essentials are already decided. Gather these details before you open the editor.
Have these ready
- Couple names
- Wedding date
- Venue name and address
- Ceremony and reception times
- Main wedding photograph
- RSVP deadline
- Meal options, if already known
- Accommodation details, if relevant
Step 1: Choose a professionally designed invitation
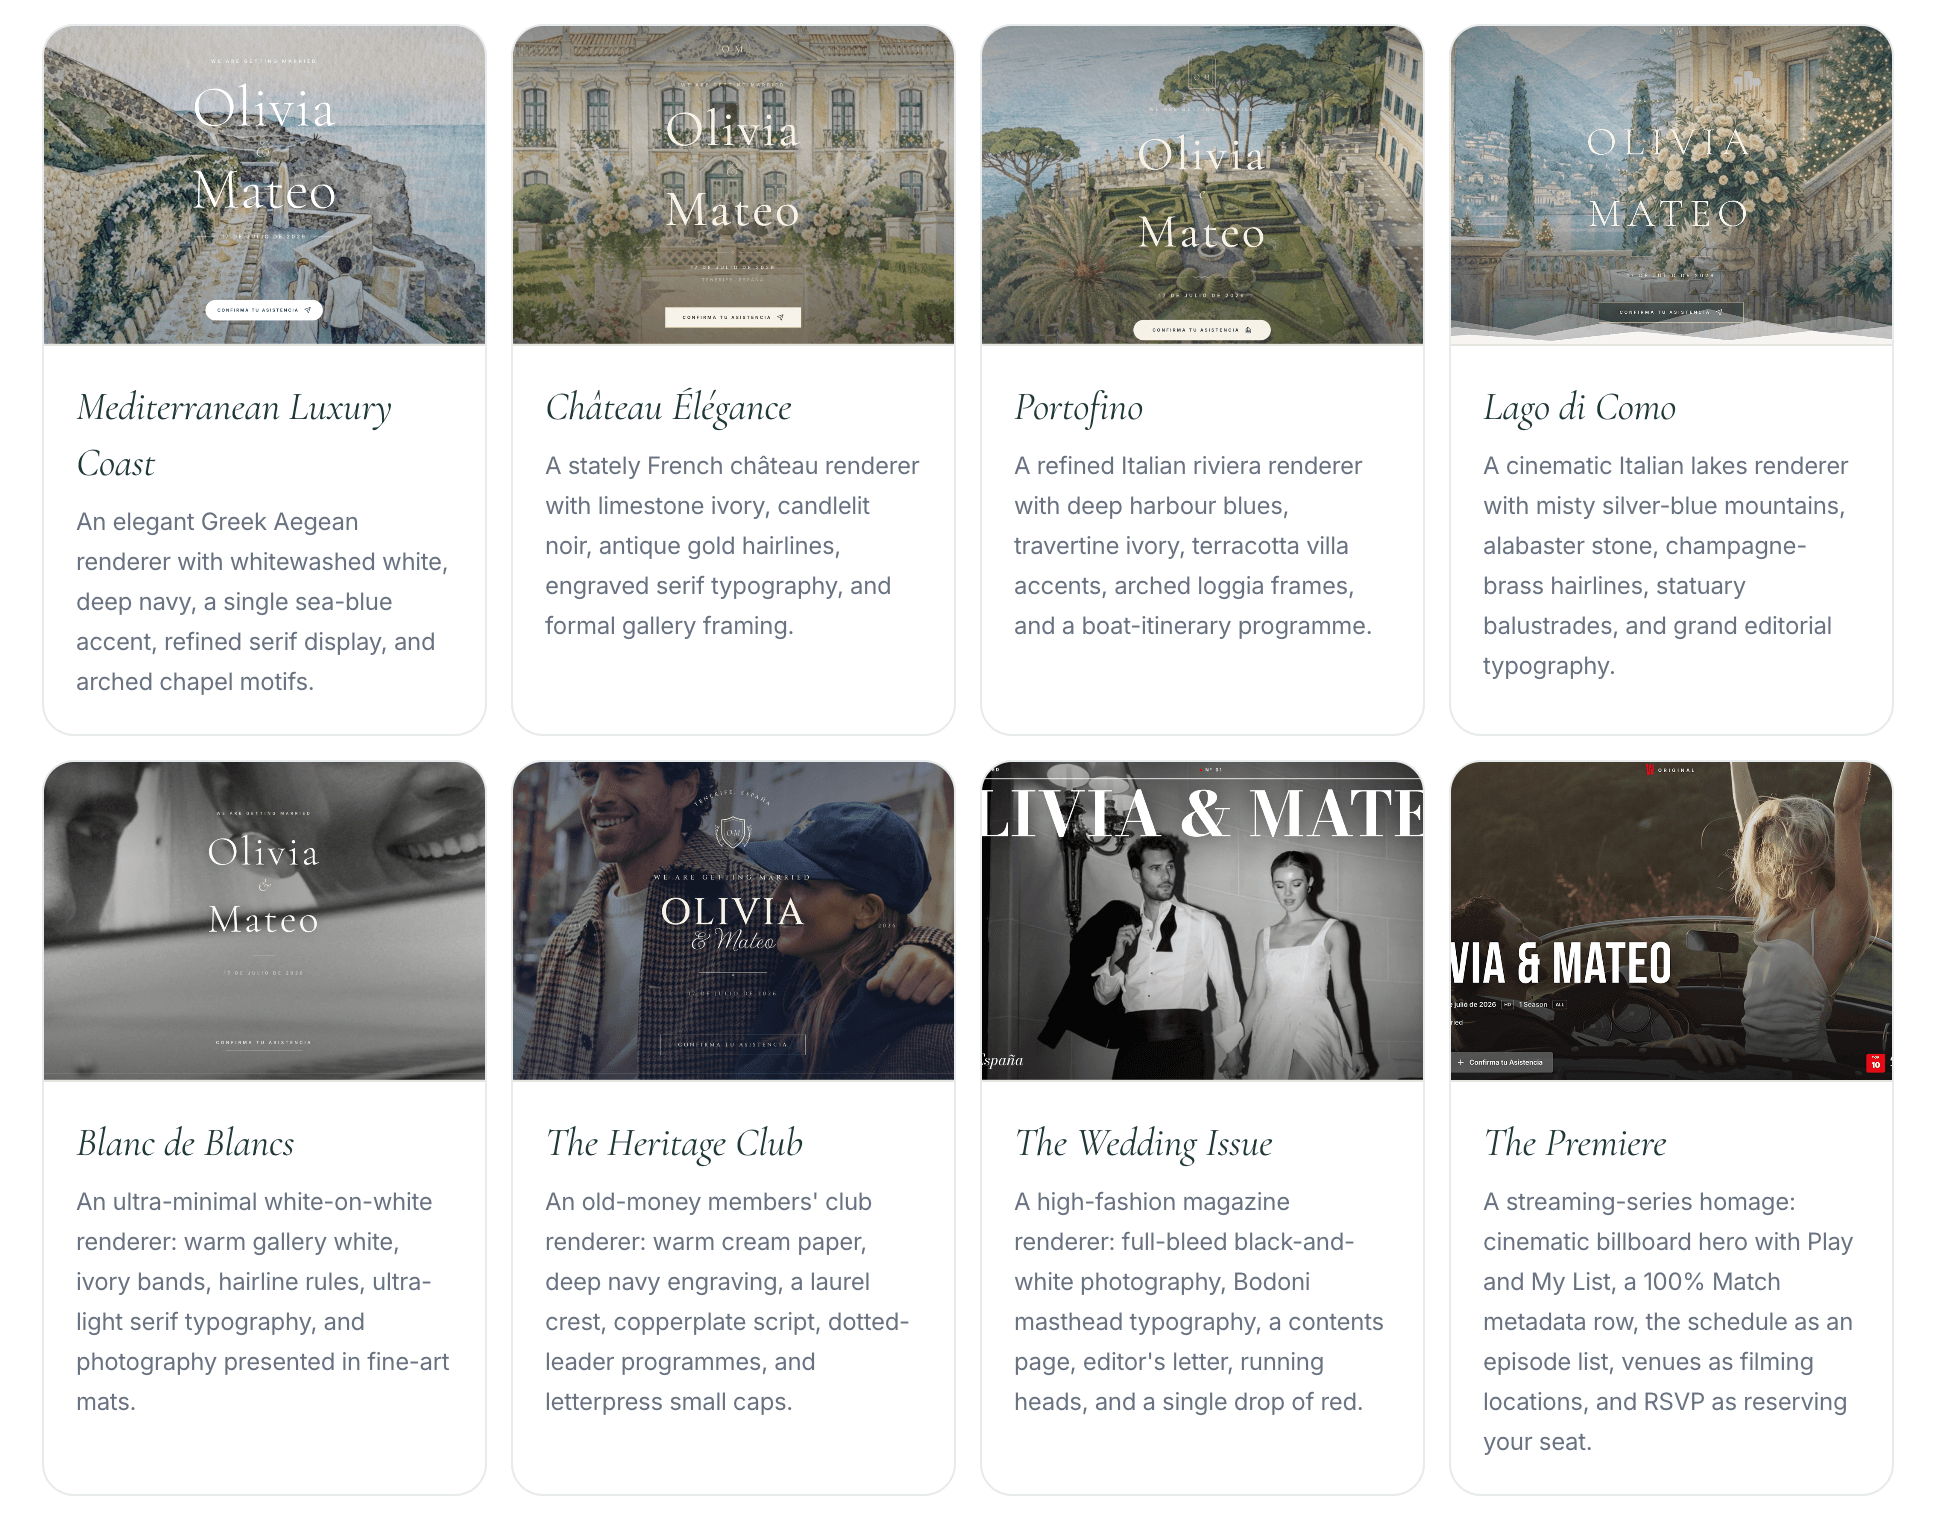
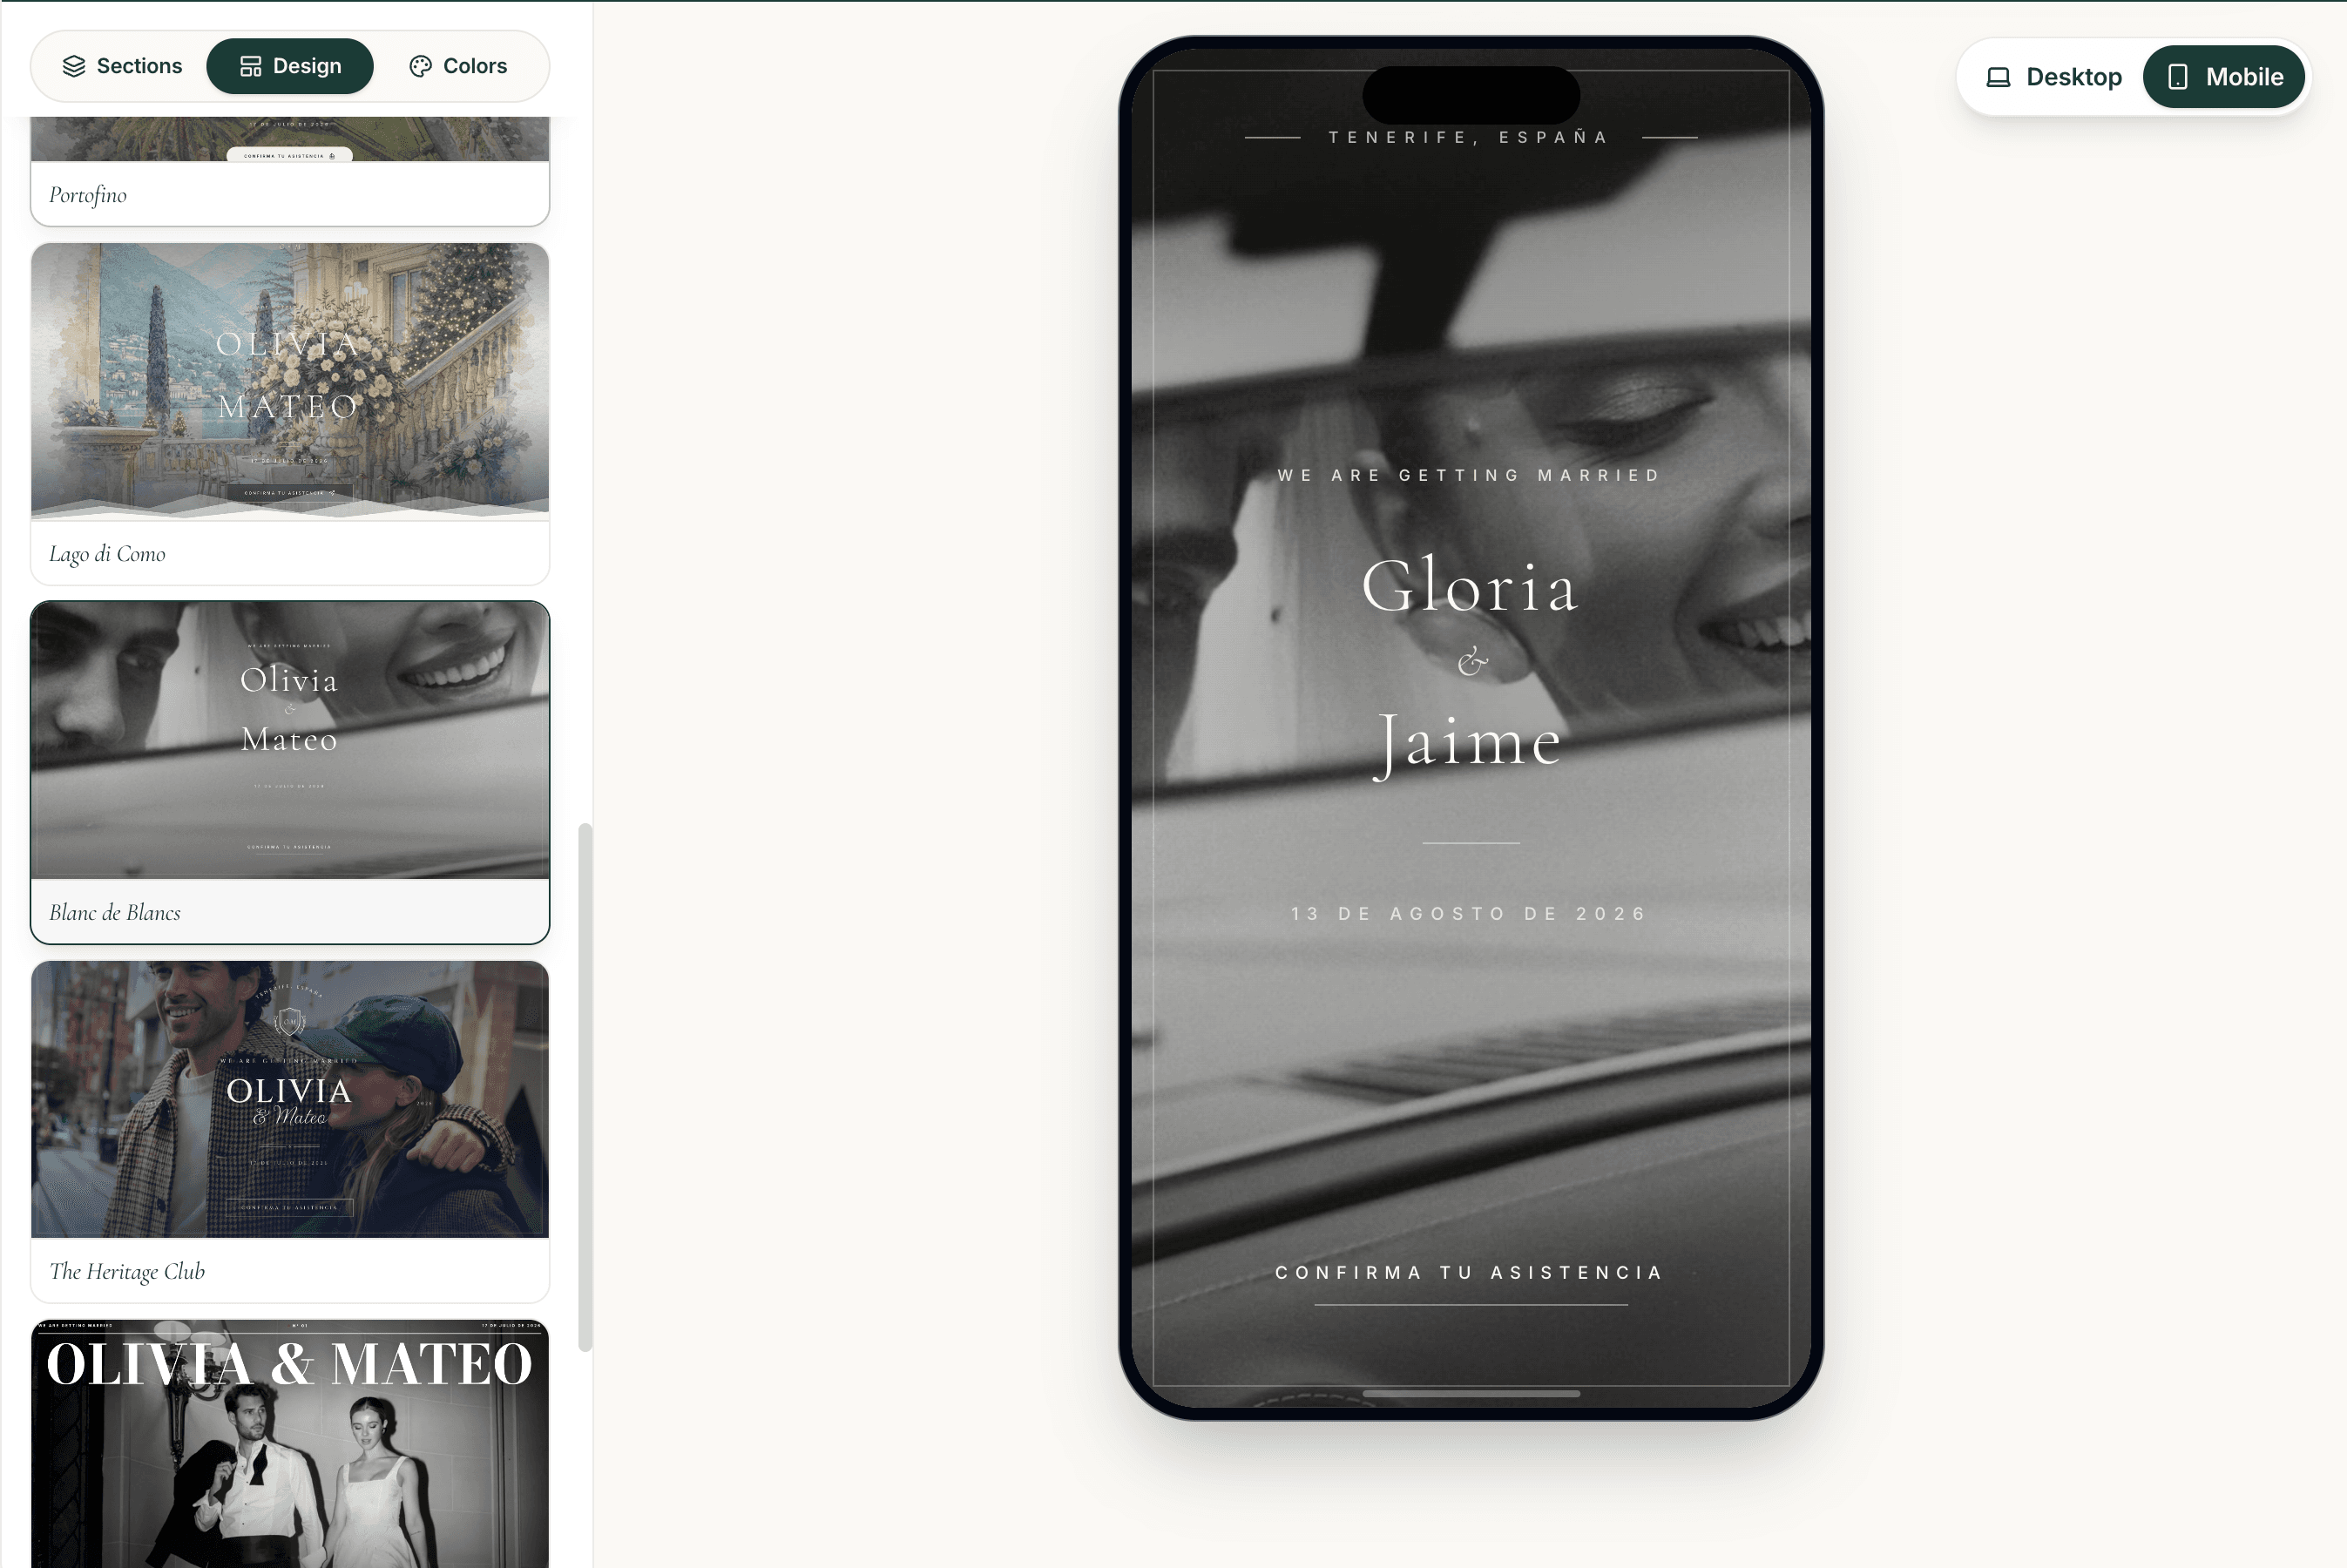
The Wedy starts with curated, premium invitation designs rather than a blank page. Each design is prepared for desktop and mobile, so guests see a finished composition instead of a half-built layout.
Different visual styles suit different weddings — formal city celebrations, romantic countryside weekends, coastal and destination events, and more restrained contemporary looks. Choose the design that feels closest to your wedding, then personalise from there.
Step 2: Add the wedding basics
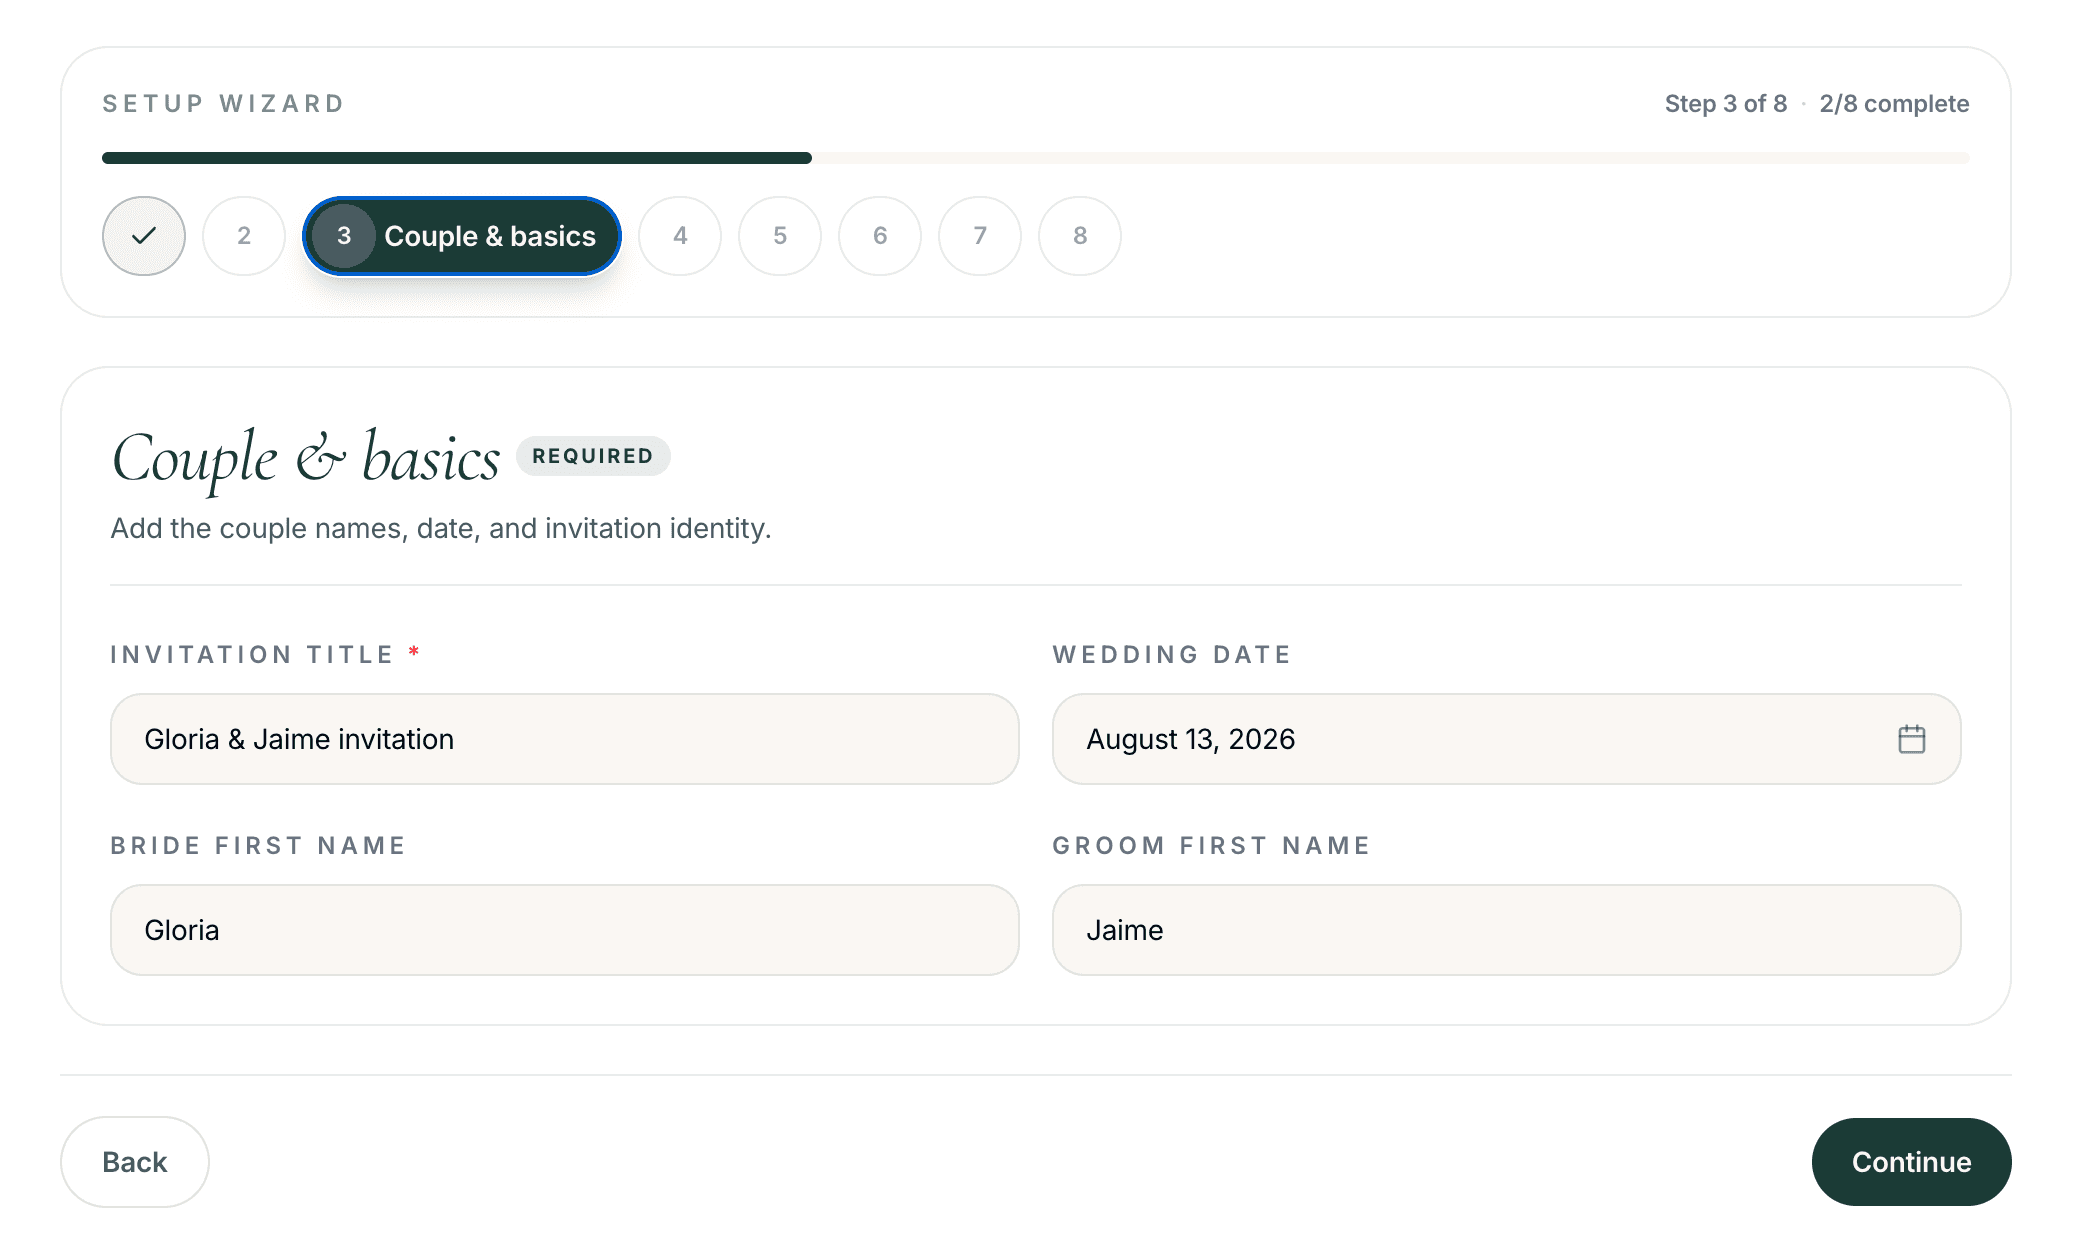
Next, enter the core wedding information. These details appear throughout the invitation and keep every section consistent.
Add:
- Couple names
- Wedding date
- Venue
- Ceremony time
- Reception time
- Primary language
Once these basics are in place, the rest of the invitation has a clear foundation.
Step 3: Add the essential guest information
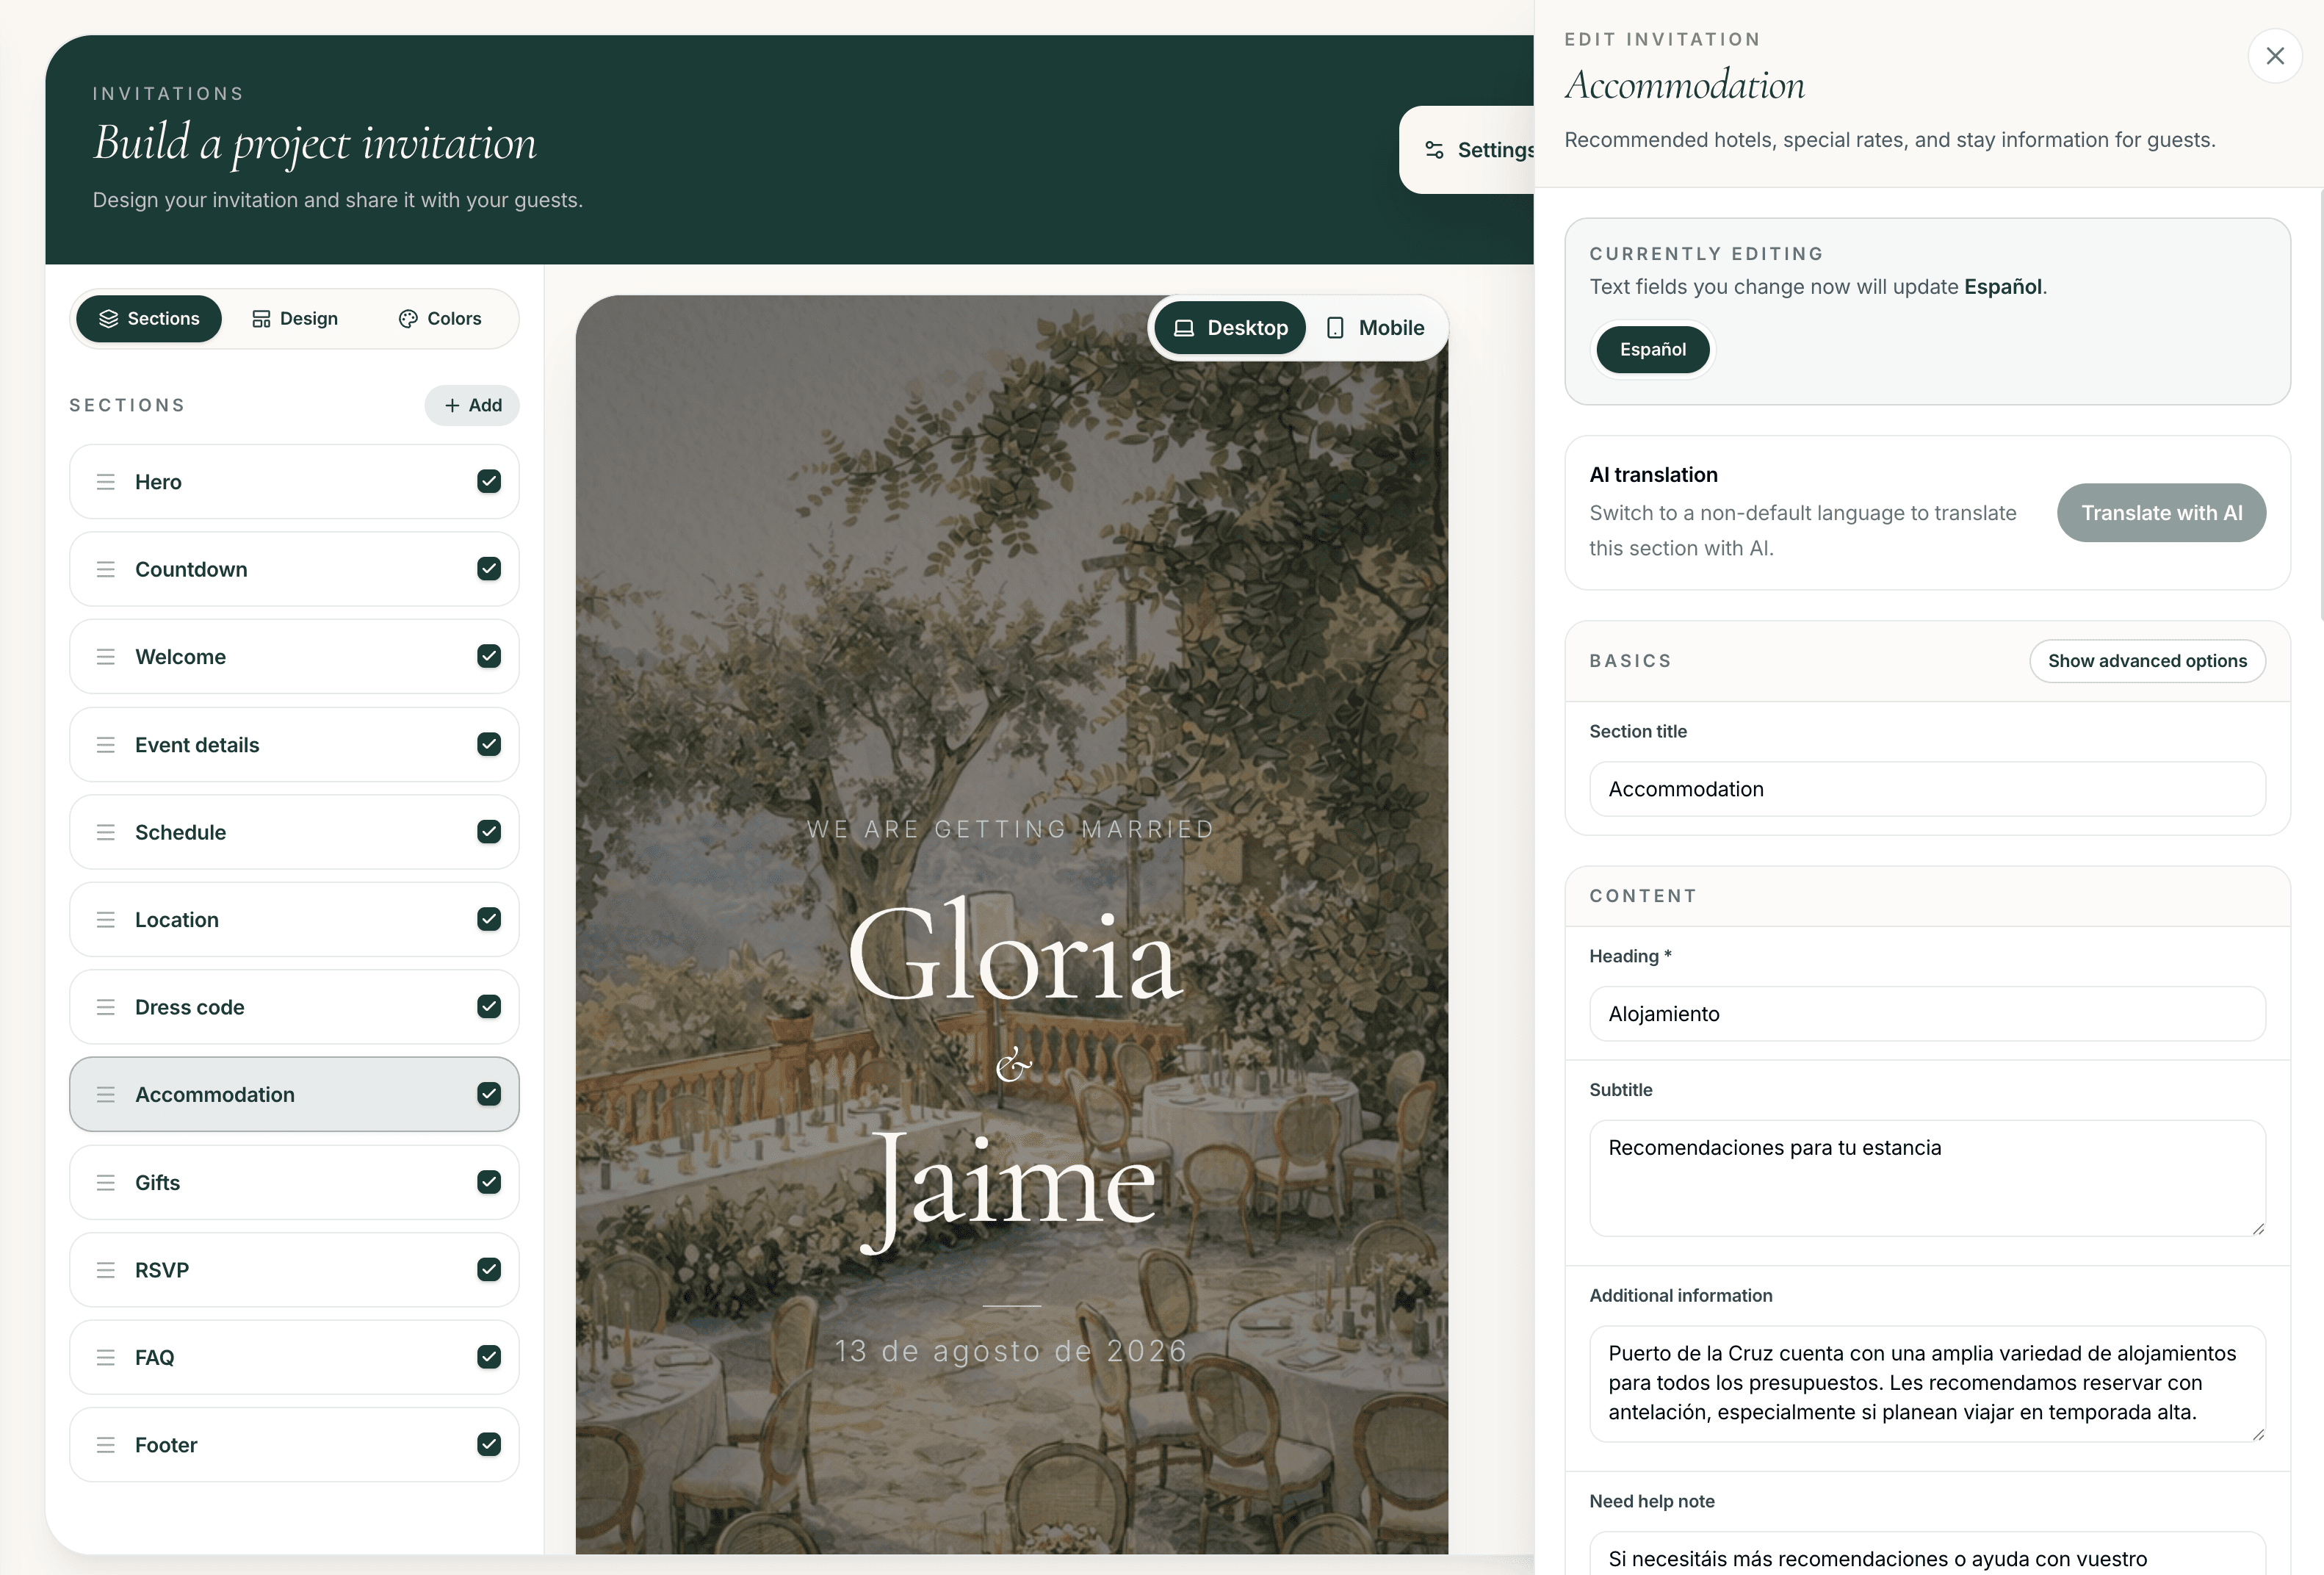
The invitation is modular. Activate only the sections your guests need and leave the rest out.
Common sections include:
- Welcome
- Countdown
- Event details
- Schedule
- Location
- Dress code
- Accommodation
- Gifts
- FAQs
- Custom sections
A simple wedding might need only schedule, location and RSVP. A destination weekend can add accommodation, travel notes and FAQs without rebuilding the whole page.
Step 4: Personalise the design
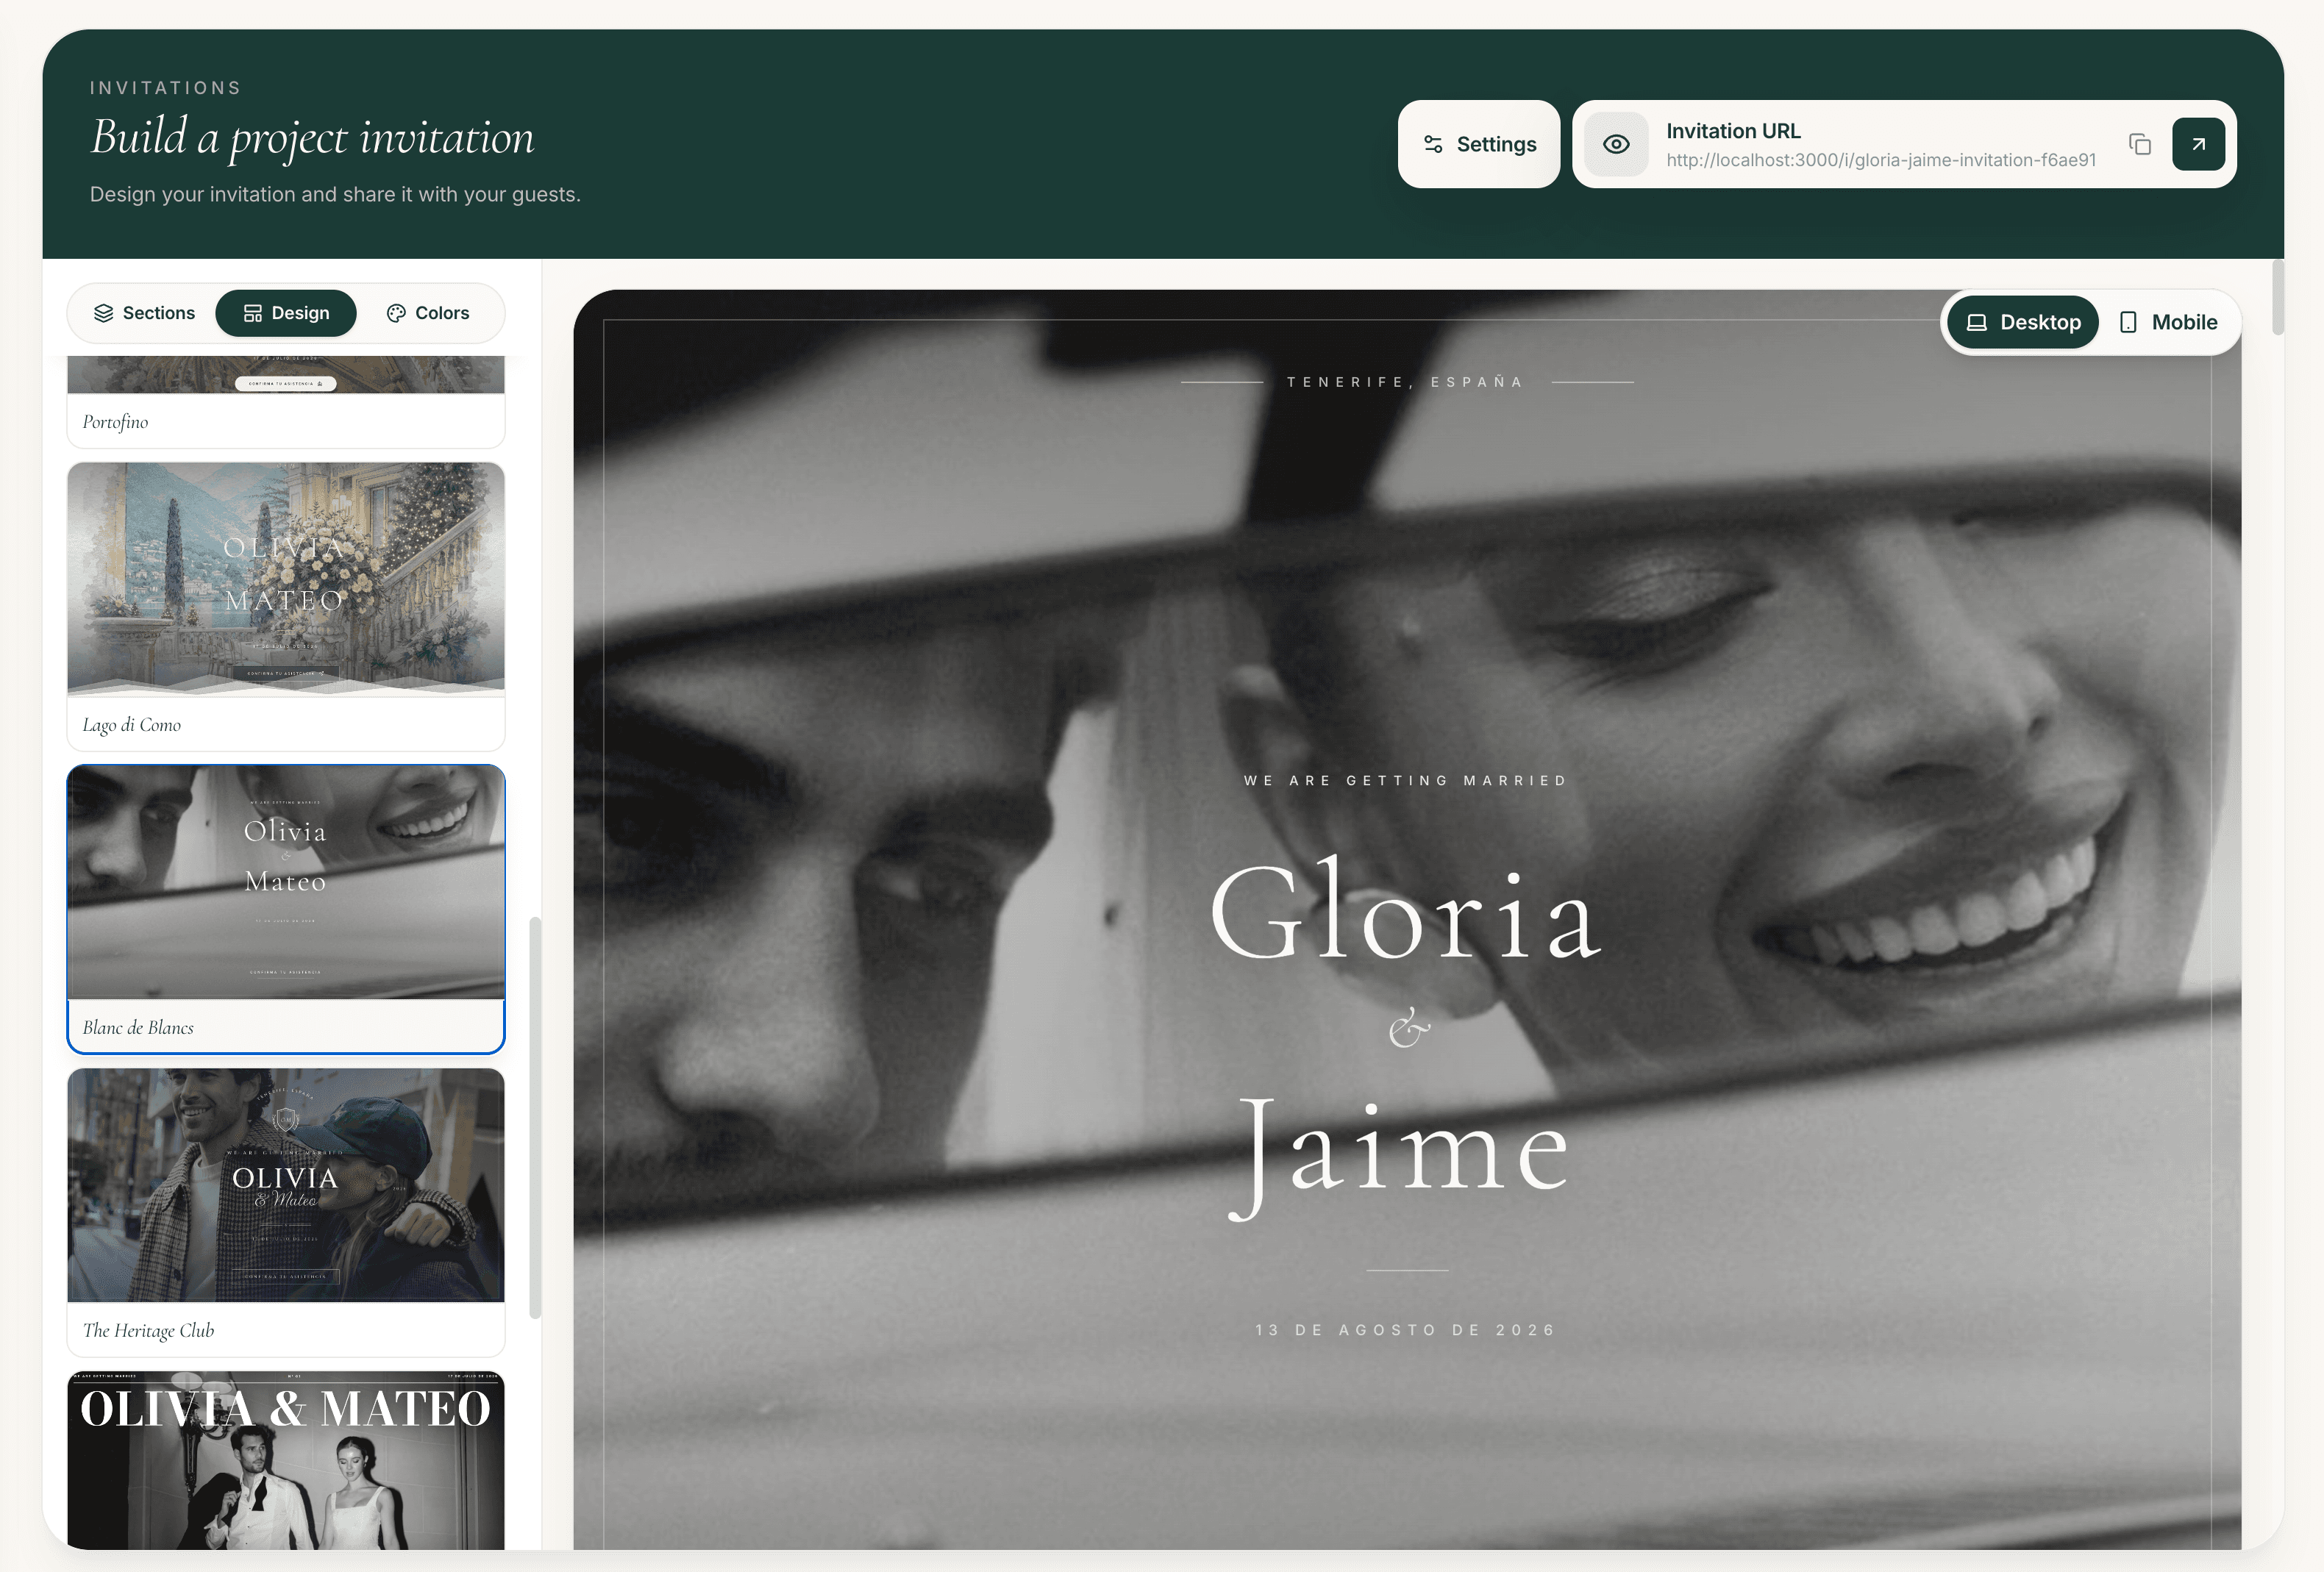
Fast does not need to mean generic. Personalisation keeps the structure of the design while making the invitation feel unmistakably yours.
Typical adjustments include:
- Accent colours
- Background
- Font style
- Hero photography
- Custom music
- Intro or loop video
- Monogram
- Venue imagery
- Optional AI-generated venue illustration based on your venue photograph
- Optional custom domain
A custom domain is optional and may be available as an add-on or as part of the Planning Suite. Check current options on the pricing page before you decide.
Venue illustration is a design option within the invitation workflow, not a separate product. Used well, it helps the invitation feel connected to the real place without starting from a blank canvas.
Step 5: Configure the RSVP
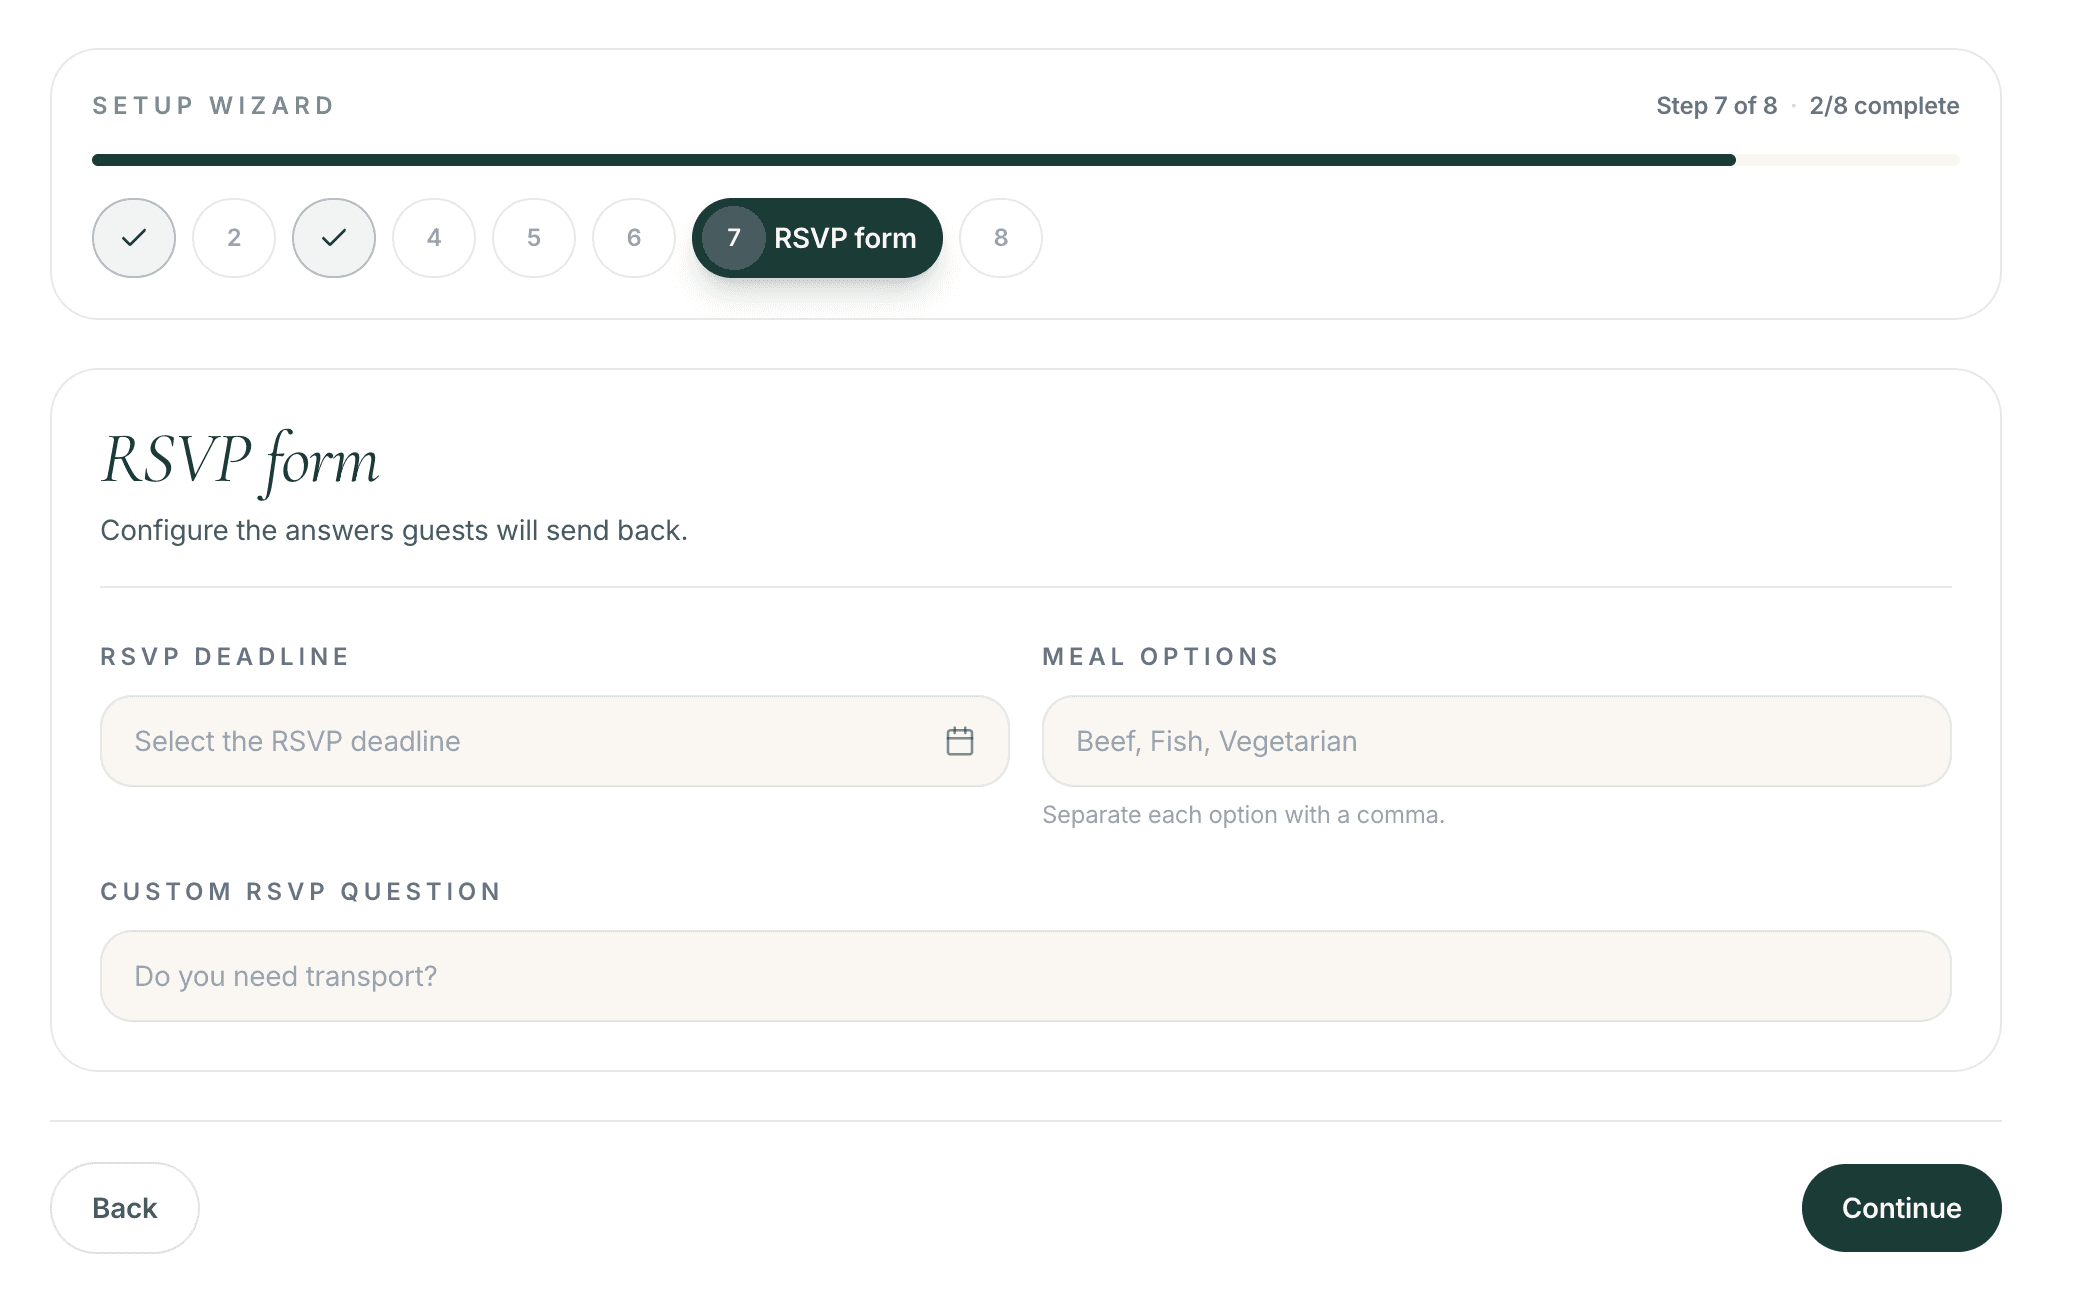
RSVP configuration is where the invitation becomes operational. Instead of collecting replies across messages and notes, you define the questions once and receive structured answers.
Couples can collect:
- Attendance
- Plus-one information
- Meal choices
- Dietary restrictions
- Phone number
- Custom questions
- RSVP deadline
Responses enter the organised guest directory automatically, so attendance, meals and contact details stay attached to each guest rather than scattered across inboxes.
Step 6: Preview the invitation
Preview the invitation on desktop and mobile before you share it. Most guests will open the link from WhatsApp or another mobile messaging app, so the phone view is the one that matters most.
Check:
- Readability of names, dates and times
- Image quality and cropping on a phone screen
- Location links and schedule clarity
- RSVP questions and deadline
Invitations can be bilingual — up to two languages — with a language switcher for guests when a second language is enabled.
Step 7: Publish and share
When the invitation is ready, publish it and share the wedding link. Guests open it in a normal browser — no app download required.
Common ways to send the link include:
- SMS
- A printed card with a QR code that opens the wedding link
Printing a QR code for your public invitation URL is a practical sharing tip. The Wedy does not currently provide a dedicated invitation-QR product feature. The product QR later in the workflow is for seating lookup on the wedding day.
The 10-minute checklist
Use this timing as a practical starting point for a simple invitation when the essential information is already prepared. More detailed personalisation can continue after the first version is live.
Minutes 0–2
- Select the design
- Add names, date and venue
Minutes 2–5
- Add the schedule
- Add location and essential guest information
Minutes 5–7
- Upload imagery
- Adjust the visual style
Minutes 7–9
- Configure RSVP questions
- Add the RSVP deadline
Minute 10
- Preview
- Publish
- Share
What happens after guests RSVP?
This is where The Wedy differs from invitation-only platforms. Guest answers do not stop at a confirmation message — they continue into the planning workflow.
The typical sequence looks like this:
- Create the invitation
- Send personal guest links
- Collect structured RSVPs
- Build the guest directory automatically
- Organise couples, families and guest groups
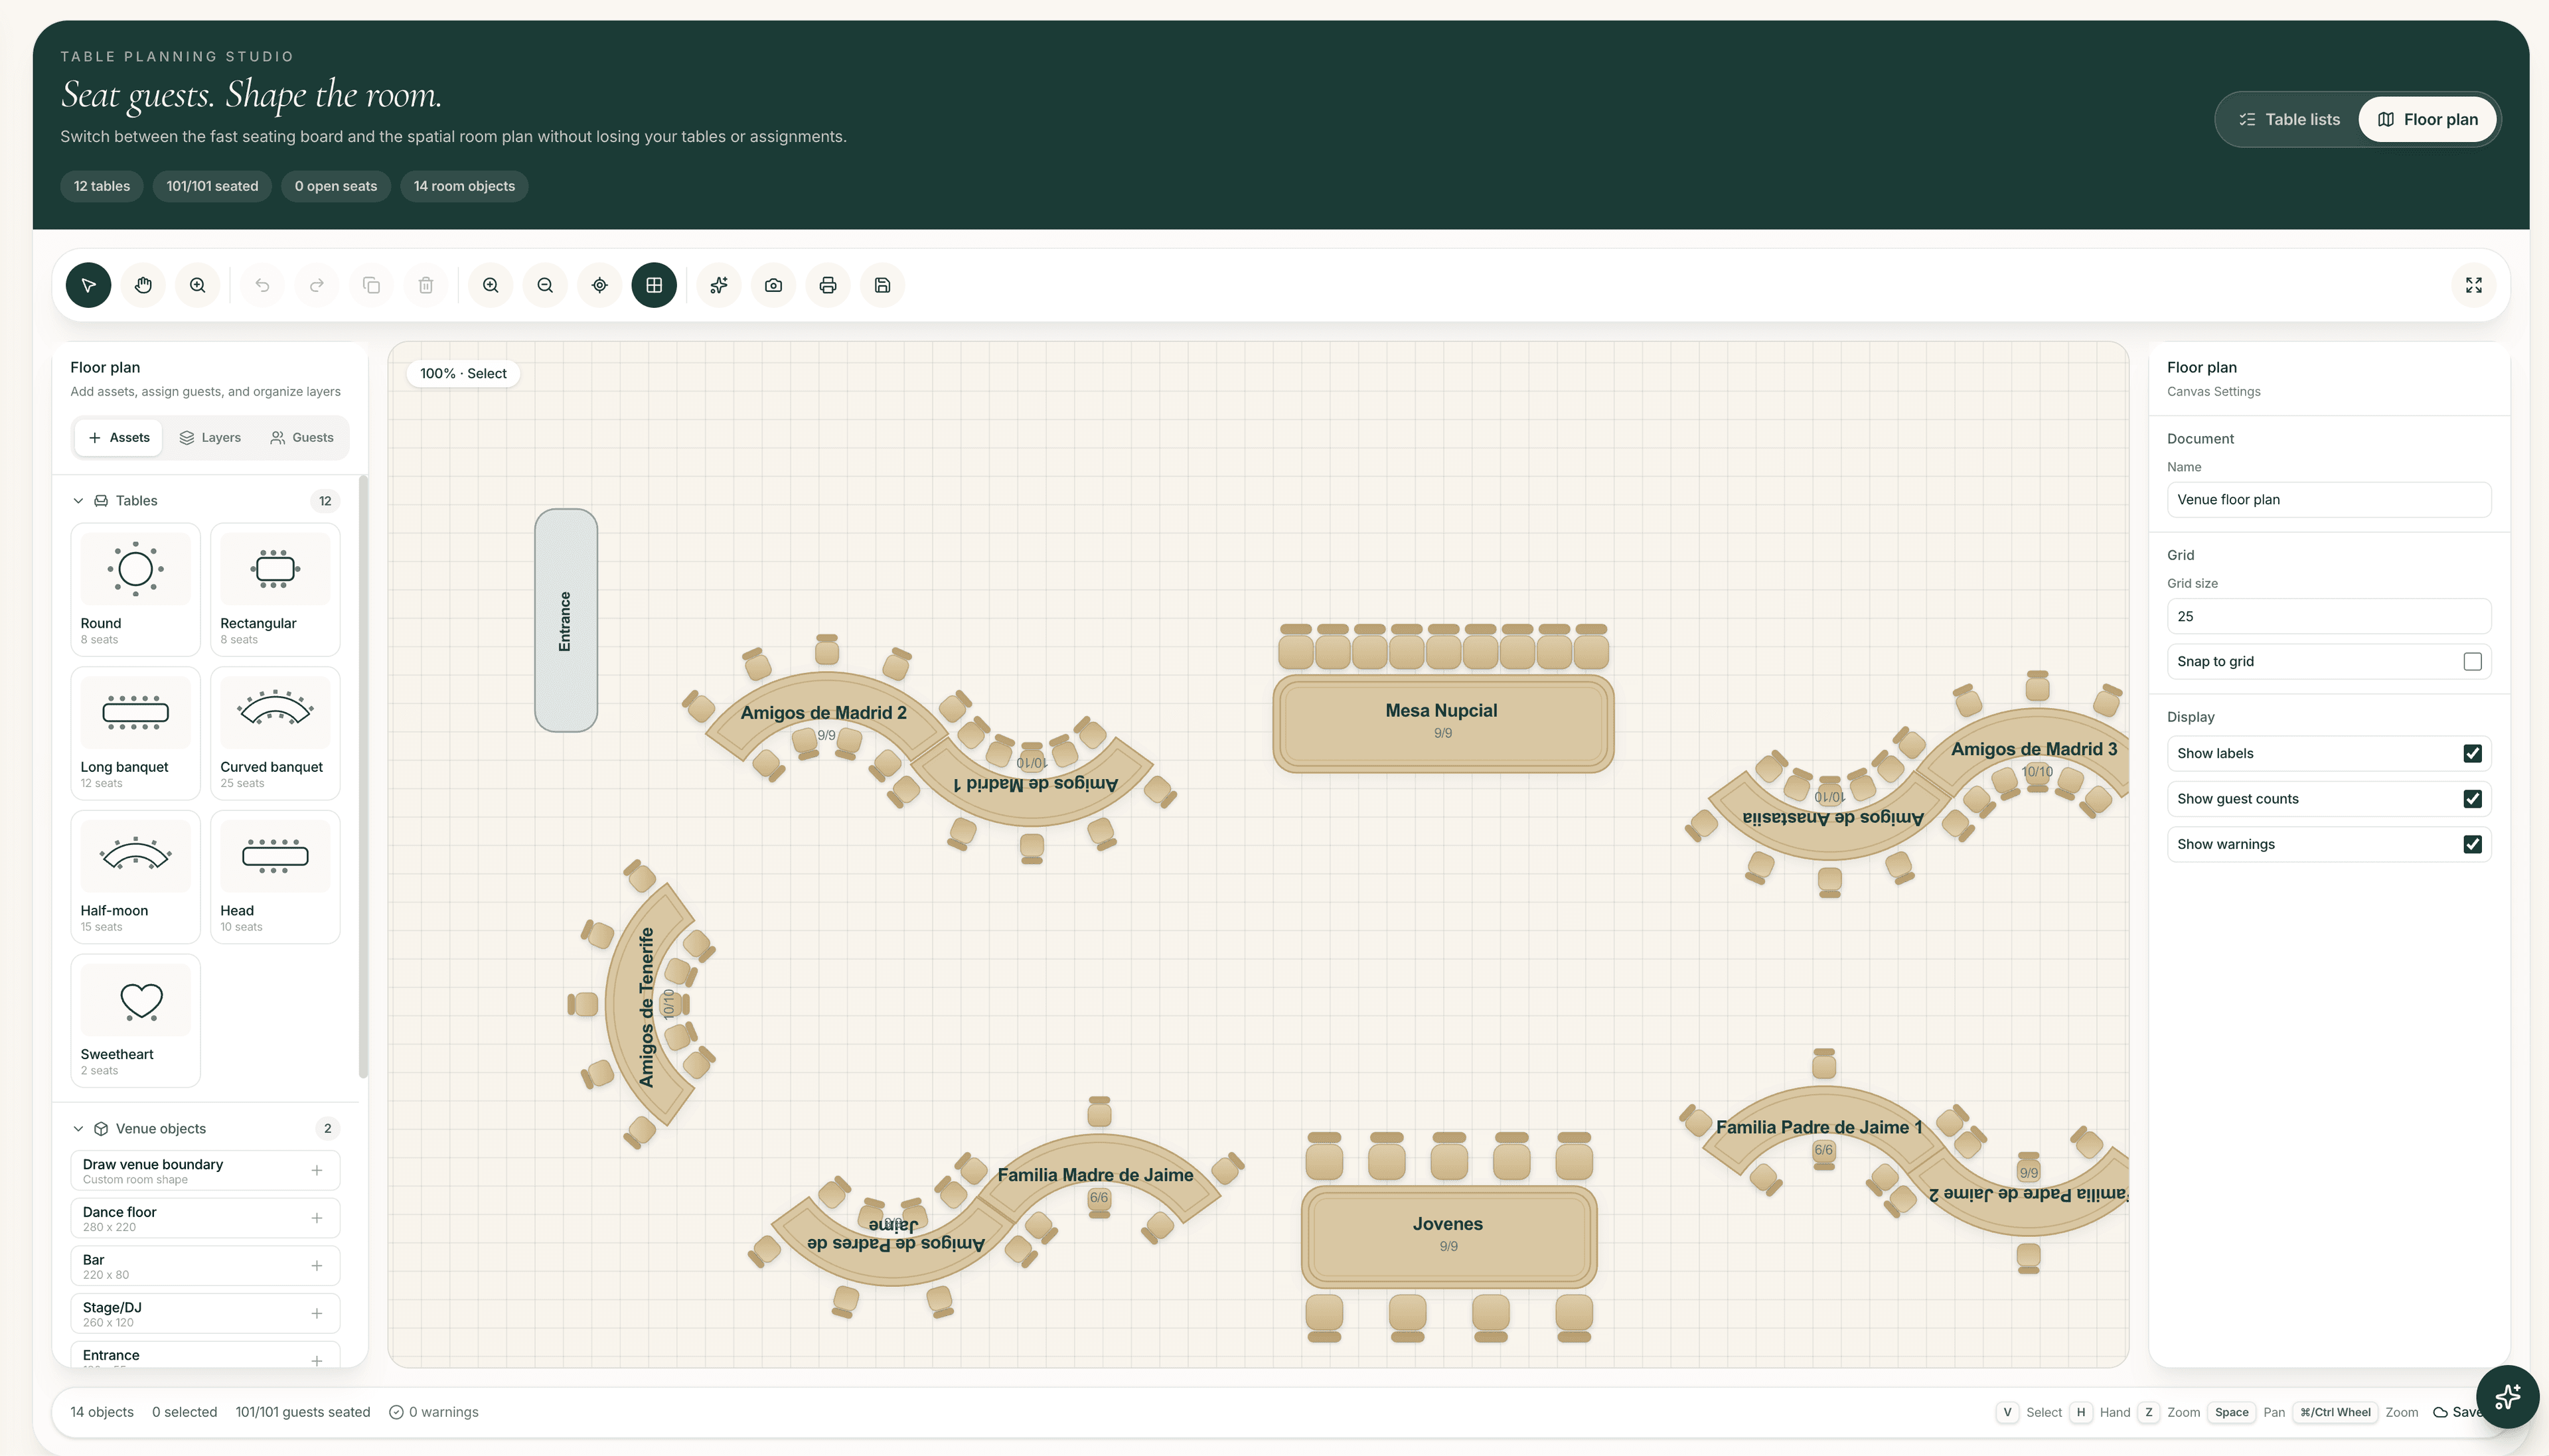
- Assign confirmed guests to tables
- Create the venue floor plan
- Share the public QR seating lookup on the wedding day
The QR lookup refers to the seating plan, not the original invitation. Guests scan it to find their table once seats have been assigned.
Because RSVP data already lives in the guest directory, you do not need to copy names, meal choices and attendance into another spreadsheet before seating begins.
Frequently asked questions
Can I edit the invitation after publishing?
Yes. Wedding information can change, so couples can update the invitation after it has been published.
Do guests need to download an app?
No. Guests open the invitation through a normal web link.
Can the invitation be bilingual?
Yes. The invitation can support up to two languages, with a language switcher for guests.
Can I use my own wedding domain?
Yes, a custom domain is available as an optional feature. See current pricing and availability for details.
Can I still send printed invitations?
Yes. Printed stationery and a digital invitation can be used together. The digital version is especially useful for live updates, maps, accommodation information and RSVP collection.
Can I use the RSVP guest list for the seating plan?
Yes. Guest responses enter the guest directory and can later be used with The Wedy’s seating-plan and floor-plan tools.